

Uwe's Shop: We can show you how to do it, Boats, Alfa Romeo, ,Post and Beam, kit projects and other projects I tinker with.
Sunday, December 15, 2013
Snow blower test
I used the snow blower for the first time this winter in a foot of snow. Yes it had lots of power, too much , the wheel base is too wide and cant drive through the snow it wants to ride up over it. I need to fasten some wings to the side of the blower to get the wheels to dive through the snow ,not up onto it. That was the only issue other than the fact that the carburetor needs a good cleaning , its running too rich and will stall when it gets warm. plenty of power to move the snow.

Wednesday, November 6, 2013
The Ariens snowblower
My Friend Dick gave me an old Arins snow blower 3 years ago, and i have kept it running with duck tape over the years. I was going to replace it with another Craftsman that has a blown engine but i am having a hard time locating a block ,so the Ariens gets a face lift.
First I dumped the old stubby wheels, they were not good in the heavy snow and mounted some large balloon tires that I had laying around. The drive shaft bushings were all worn out and they were replaced with oilier barrings. The shaft was too short for the new tires so we modified the shaft by welding an extension shaft on and pinning the two together. (see video). The old engine came off . Its an old point system and it just would not start in the winter anymore,it was small and under powered.
I acquired a beefy Briggs and Straton off an old rototiller, this thing is big,and mounted it on the power section of the blower.
The blower is cool it separates with just 2 bolts and i can take the entire drive train off the blower section.
So it got separated and while there i cleaned up the power takeoff clutch,
The first problem is that the mounting holes did not match the old engine. So they were cut off and new holes where drilled to accommodate the new position. They had to be marked accurately, drilled ,tapped with 5/16 24 and back bolted because the tapped holes were probably not strong enough for the larger engine. Eight hours later ,lots of machine work and the engine is in.
She got a new throttle cable ,new springs and belt ,everything got tighten up and when i pulled the cord she ran, nice.
Lots of torque and power now.
The only problem i have now is that i cant rotate the dump shoot, i have to do it by hand for now. This is because the bracket that holds the gear assembly in position for the shoot had to be removed because it now interfered with the new larger engine housing. I'm not too concerned , will figure something out later .'
For now it works and I have a souped up snow blower on steroids.
First I dumped the old stubby wheels, they were not good in the heavy snow and mounted some large balloon tires that I had laying around. The drive shaft bushings were all worn out and they were replaced with oilier barrings. The shaft was too short for the new tires so we modified the shaft by welding an extension shaft on and pinning the two together. (see video). The old engine came off . Its an old point system and it just would not start in the winter anymore,it was small and under powered.
I acquired a beefy Briggs and Straton off an old rototiller, this thing is big,and mounted it on the power section of the blower.
The blower is cool it separates with just 2 bolts and i can take the entire drive train off the blower section.
So it got separated and while there i cleaned up the power takeoff clutch,
The first problem is that the mounting holes did not match the old engine. So they were cut off and new holes where drilled to accommodate the new position. They had to be marked accurately, drilled ,tapped with 5/16 24 and back bolted because the tapped holes were probably not strong enough for the larger engine. Eight hours later ,lots of machine work and the engine is in.
She got a new throttle cable ,new springs and belt ,everything got tighten up and when i pulled the cord she ran, nice.
Lots of torque and power now.
For now it works and I have a souped up snow blower on steroids.
Friday, October 11, 2013
Alfa Romao primed
The Alfa is primed with a 2 part urethane primer. Still some minor touch up to do and then the paint. Its getting colder and i need at least 65 deg to paint the car .
Sunday, October 6, 2013
Playing with the pentax camera
I was cleaning some of Joys playthings and i thought that i might also play with my toy.
I took the 75-200 mm lens mounted in reverse on the camera and this is the result.

I took the 75-200 mm lens mounted in reverse on the camera and this is the result.

Monday, September 9, 2013
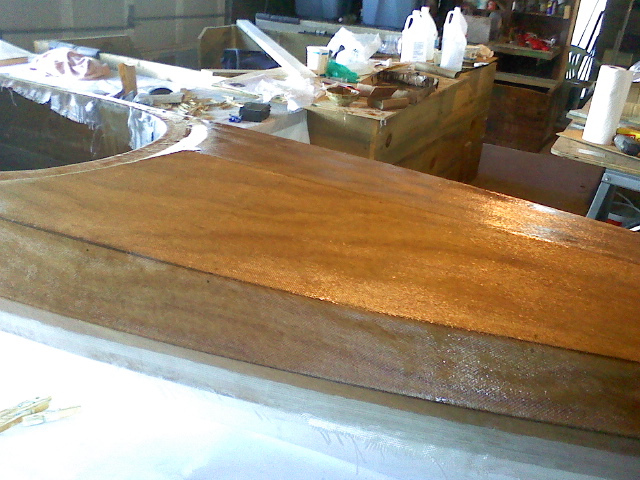
The MOTH construction of stitch and glue kayak
The project was started July 4th until August 26 .
We spent 7.5 hrs on the lower stitch and seam glue up with first coat of epoxy.


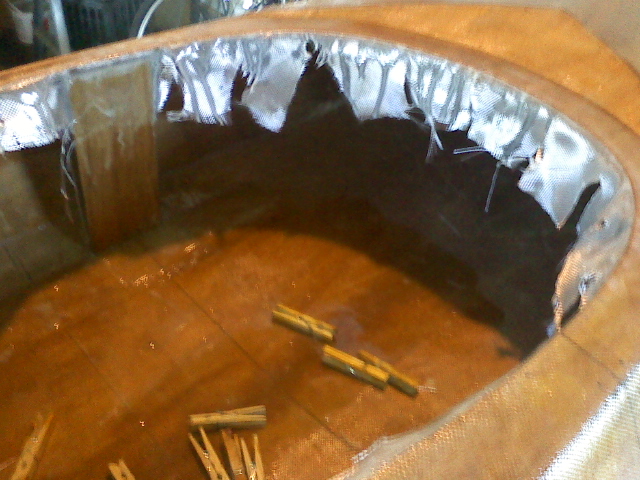
Inside of upper deck was glassed up first and all stitching seams glued up ,then stitching removed.
The past 3 weeks we have gone from a kit to an assembled boat,This is all seams sealed and a complete inside layup of fiberglass , another 25hrs to this point.
Its Aug 12 The upper deck is set , the inside seams are done. The knee braces are now installed. The blanket is glued down, a second coat on the upper deck and lots of sanding. At this point we are out of epoxy and had to order another quart to finish the project
Now Aug 20 i think week 5 and another 12.5 hrs of work the rest is just waiting for things to set up.
The hatch opening is layed out and the cockpit combing is now getting its final cleanup for finish work.
The hatch is cut out with a dremel tool and the trim work installed When doing this you are also required to install a bulkhead aft of the seat position .This was a bit tricky to fit but take your time and it will work just fine.Its now Aug 26 and we put in another 16 hrs to this point
The hardware is now fitted and installed. A custom fit is always better so we placed ANN in her new kayak and st up the foot braces
So here is how the moth got its name and as you can see it floats just fine
The project took just shy of 2 months at a minimum of 61 hours but there was a lot of time not kept track of by two people. The kayak is currently on the seacoast in Main .
I am adding some more pictures that where taken by Carl


We spent 7.5 hrs on the lower stitch and seam glue up with first coat of epoxy.
 |
| Frame bulkheads |
 |
| stitch |
 |
| plate to rest on when turned over |
 |
| supplies |


The following week we put in 6 hrs for fiberglass 1st second and third layer with lots of trim and cleanup in between
 |
| bulkheads to fit upper deck |
The upper deck was next, stitch and first layer took 4 hrs total
We had now completed another week
 |
| first fit |
 |
| second fit |
 |
| final before glass |
Inside of upper deck was glassed up first and all stitching seams glued up ,then stitching removed.
this was done while fit on the bottom frame, once glue set ,blankets were laid on and then lots of sanding
This entire process took over 15 hrs
 |
| Its glued down now sanding and cleanup |
 |
| note the tape so we don't glue the deck down too soon |
 |
| Things get small up front and there are fill blocks that have to be addressed also |
 |
| underside layup |
 |
| Glue down |
 |
| sanding after first epoxy coat |
 |
| fit the blanket |
 |
| trim |
 |
| cut to length |
The past 3 weeks we have gone from a kit to an assembled boat,This is all seams sealed and a complete inside layup of fiberglass , another 25hrs to this point.
Its Aug 12 The upper deck is set , the inside seams are done. The knee braces are now installed. The blanket is glued down, a second coat on the upper deck and lots of sanding. At this point we are out of epoxy and had to order another quart to finish the project
 |
| first layer |
 |
| trim and knee braces |
 |
| keep your edges clean |
 |
| second layer combing is set |
 |
| final layer ,note combing |
The hatch opening is layed out and the cockpit combing is now getting its final cleanup for finish work.
 |
| clamping down |
 |
| set lower trim ring |
 |
| hatch is cut out |
 |
| note bulkhead |
 |
| rough fit |
 |
| final sanding |
 |
| water gasket installation |
 |
| nice lines |
So here is how the moth got its name and as you can see it floats just fine
The project took just shy of 2 months at a minimum of 61 hours but there was a lot of time not kept track of by two people. The kayak is currently on the seacoast in Main .
 |
| the fit |
 |
| approved |
 |
| THE MOTH |
 |
| it floats |
 |
| Enjoy |
I am adding some more pictures that where taken by Carl


Thursday, August 29, 2013


Subscribe to:
Posts (Atom)